
I will discuss about AVR8 Burn-O-Mat; so far the best one in my judgement. Before you use that, you should practice a few AVRDUDE commands which will give you some insight on accessing usbasp and the target devices. In fact, AVR8 Burn-O-Mat employs AVRDUDE for its programming tasks. Lets get started with AVRDUDE.
AVRDUDE
AVRDUDE is the shortened version of AVR Downloader/UploaDEr. It was started by Brian S. Dean as a project for In System Programming.It supports many AVR Programmers including our usbasp.
Installation
AVRDUDE comes as a package included within WinAVR. It is installed with it automatically. If you already have WinAVR installed on your PC, you will not need to do anything. However, older versions of WinAVR do not work with usbasp. As the included AVRDUDE versions are older too. I suggest you to install a newer version of WinAVR. You can install WinAVR 20100110. Click Here to download it.
If you have any older version of WinAVR, uninstall it first. Then install WinAVR 20100110.
Working with AVRDUDE
- Click Start -> Run.

- Type in cmd and click OK.
- The Command Prompt should appear.

- Type in avrdude and press enter.
- If avrdude is installed, then the following output should come. It shows the command reference.

- Every command line should start with the keyword avrdude.
- You have to specify the following things in each command line.
- Programmer Hardware you are using. For us, usbasp.
- The target AVR model you are operating on.
- Type of operation, read/write.
- Source and destination. For example from .hex file to flash ROM (write), from flash ROM to .hex file (read).
- To specify a programmer, use the keyword -c <programmer name>. We will write -c usbasp.
- To see a list of supported programmers, type in avrdude -c abcd and press enter. Here abcd is just as a random argument instead of a programmer name. The following output will show a list of programmers supported.

- To see what are the AVR models that can be programmed, type in avrdude -c usbasp and press enter. In the list you will see the shortened part names.

- To specify the target AVR model use -p <partname> in the command prompt.
- Do not connect the usbasp to your PC yet. Type in avrdude -c usbasp -p m8 and press enter. Here m8 is the shortened name for ATmega8. You can type ATmega8 instead of m8.The following error message should come.

- It tells you that the usbasp programmer is not connected to the PC. Remember, this message may also appear if the device driver is not installed properly.
- Now connect the usbasp to the PC. But do not connect any target Microcontroller with it. Type in the same command again, avrdude -c usbasp -p m8. You should see the following error message.

- This indicates that usbasp is connected to the PC but we have not connected any AVR microcontroller with the usbasp. Even if you connect a Microcontroller with the ISP Cable, this type of error message might come for the following reasons,
- The Serial Clock (SCK) is too fast or too slow. Set or unset the Slow SCK jumper.
- The target Microcontroller is not connected properly.
- The target Microcontroller is not powered up.
- The target Microcontroller is damaged.
- Fuse settings are incorrect or a proper external crystal is not connected.
- I hope you get the idea. Now connect the target Microcontroller. Using a cable, connect the five lines SCK, MISO, MOSI, RESET and GND properly with the target. Power up the target device by connecting VCC and GND to a 5V power supply. Here we are using a separate power supply. However, the GND node is common to both the usbasp master and the target device. Check and Double check the connections.

- I have connected an ATmega8 as a target. For ATmega8, the AVRDUDE part name is m8. I have short circuited the Slow SCK jumper as the target is operating at a very low clock speed (1 MHz). Now write again, avrdude -c usbasp -p m8 and press enter. If everything is OK, you will see the following output,

- This output means that the target device is detected successfully.
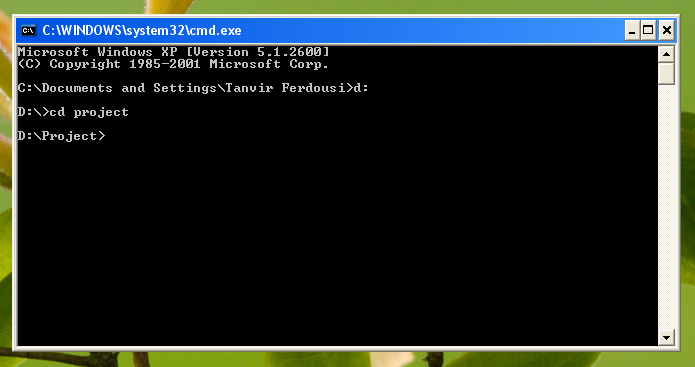
- Now lets program it with a .hex file. Suppose I have a .hex file in the "D:\Project\" directory. The name of the file is final.hex.
- Go to that particular folder in the command prompt. For my one,
- Type d: and press enter.
- Type cd project and press enter.
- the prompt should look like this,
- The syntax for memory operation is -U <memtype>:r|w|v:<filename>[:format].
- -U means it is a memory operation.
- Specify the which memory you are using in the <memtype> field. It can be flash, EEPROM or the fuses.
- r is for reading, w is for writing and v is for verification.
- Provide the name of the input file for write/verify operation or the name of the output file for read operation in the <filename> field.
- The format field specifies the file format. It is an optional field, not always required.
- To program the target AVR with this hex file type in the following code, avrdude -c usbasp -p m8 -U flash:w:final.hex and press enter. This will write the final.hex file into the flash memory of the AVR. Writing operation will start and the following messages will appear after successful write operation,

- To read a file from the device ROM, write the following code, avrdude -c usbasp -p m8 -U flash:r:myfile.hex:i and press enter. It will read the program rom and save it as an output hex file named myfile.hex. Here I mentioned the format as Intel Hex format using the keyword i.

- Similarly you can write and read the fuses.
AVR8 Burn-O-Mat
Installation
AVR8 Burn-O-Mat is a Java based program. To work with it, you must have java installed on your PC. As Java is an essential environment for many programs, most of us have it already installed. If you don't have it, go to the Java site, download the Jave Standard Edition JRE. Here JRE stands for Java Runtime Environment.
- For your convenience, here is the link for Java SE JRE. From the list choose your suitable product. Remember x86 products are for 32 bit Operating Systems.
- Download AVR8 Burn-O-Mat from this link. Install it.
- Run AVR8 Burn-O-Mat. This is the main screen.

- Go to Settings->AVRDUDE. The AVRDUDE Settings window will appear.

- Notice, the two file directories are already given. But, if you are using WinAVR 2010 then these directories are not correct. The files are located in the "C:\WinAVR-20100110\" directory instead of the "C:\WinAVR\" directory. (I assume that you installed WinAVR in the C drive)
- Click File button for AVRDUDE location. Go to the "C:\WinAVR-20100110\bin\" folder and select avrdude.exe and click open.

- Similarly for the configuration file go to the same folder and select avrdude.conf. The two directories should show up like this.

- You will not be able to select your programmer yet. You need to restart the AVR8 Burn-O-Mat. So click OK and close it. Close AVR Burn-O-Mat.
- Run AVR8 Burn-O-Mat again. Go to the AVRDUDE Settings. Now you will find the programmer list populated. From the drop down list, select usbasp. In the Port option select USB. The completed settings window will look like this,

- Click Ok. The AVR8 Burn-O-Mat is ready for you.
Operation
This program is as easy as pie. You may experiment it now. In the main window, you can write, read or verify the Flash or EEPROM memory. Choose the AVR type before any operation.
- Write: Writes an input file to the AVR flash/EEPROM.
- Read: Reads the flash/EEPROM and saves them in an output file. You need to specify an output file name first by clicking the File button.
- Verify: Compares the flash/EEPROM with a given file.
The following screen shows the main window when I programmed the AVR with the final.hex file located in my PCs D:\Project directory.

I will write a few words about the fuses. Always remember to choose the proper AVR type. The fuses can be set quite easily.

This ends the chapter here. If you face any problem you can ask me in the comments section. Best of luck!
- Select ATmega8 and Click Fuses.
- There are several methods of programming fuse bits here,
- The first tab Fuse Editor is the most basic checkbox method as it was in Pony Prog.
- The second tab, Fuse Hex Editor is the AVRDUDE style byte method.
- The third and the fourth tab are the easiest ever method for configuring AVR fuses. Actually fuse bits are modified for configuring oscillator/clock options and Brown out detection options. Here you do not need to worry about fuse bits. You can give different settings directly.

- You can give your desired settings here and click write fuses to do the job.
- You can also read, verify or choose the default settings.
This ends the chapter here. If you face any problem you can ask me in the comments section. Best of luck!
Way to go my friend......... Carry on.........
ReplyDeleteThank You my friend....
ReplyDeleteI found Hubwit as a transparent s ite, a social hub which is a conglomerate of Buyers and Sellers who are ready to offer online digital consultancy at decent cost. f95 games
ReplyDelete